I've made a couple of hoop skirts in the past, but they haven't been very successful. I've left it too late and just cobbled something together. This time was going to be different. I found an excellent tutorial here. I just used plastic coated boning for the hoops, but otherwise they're pretty much the same. I particularly liked the way the author measured a doorway! It turned out her daughter was about the same height as Charlotte, so I'm afraid I just pinched her measurements! I did make the top couple of hoops smaller, but that was due to the size I made the ruffle skirt. Here's Charlotte in the completed hoop skirt.


It looks a bit odd in shape at the top, but it looks fine with the ruffle skirt over the top. The fabric isn't spread out evenly either, but this was just a trying on session to see what size I needed to make the elastic waist. I evened thing out once all the sizes were right.
Next up was the ruffle skirt. I made an A-line skirt long enough to go over the hoop skirt and almost reach the floor. To make an A-line skirt, I normally draw a rectangle on greaseproof paper the length I need plus hem and waistband width. I measure how big I need the waist to be and divide by 4 for the width of the rectangle. For this skirt I made sure the skirt would be big enough to pull down over Charlotte's head because it doesn't have an opening for a zip. I then add on seam allowances to that. I cut the rectangle almost into strips an inch or two wide (they are still all attached together at the waist). I then just place it on a fold of my fabric and spread the strips out evenly. The picture shown obviously isn't Charlotte's skirt, but you get the idea.
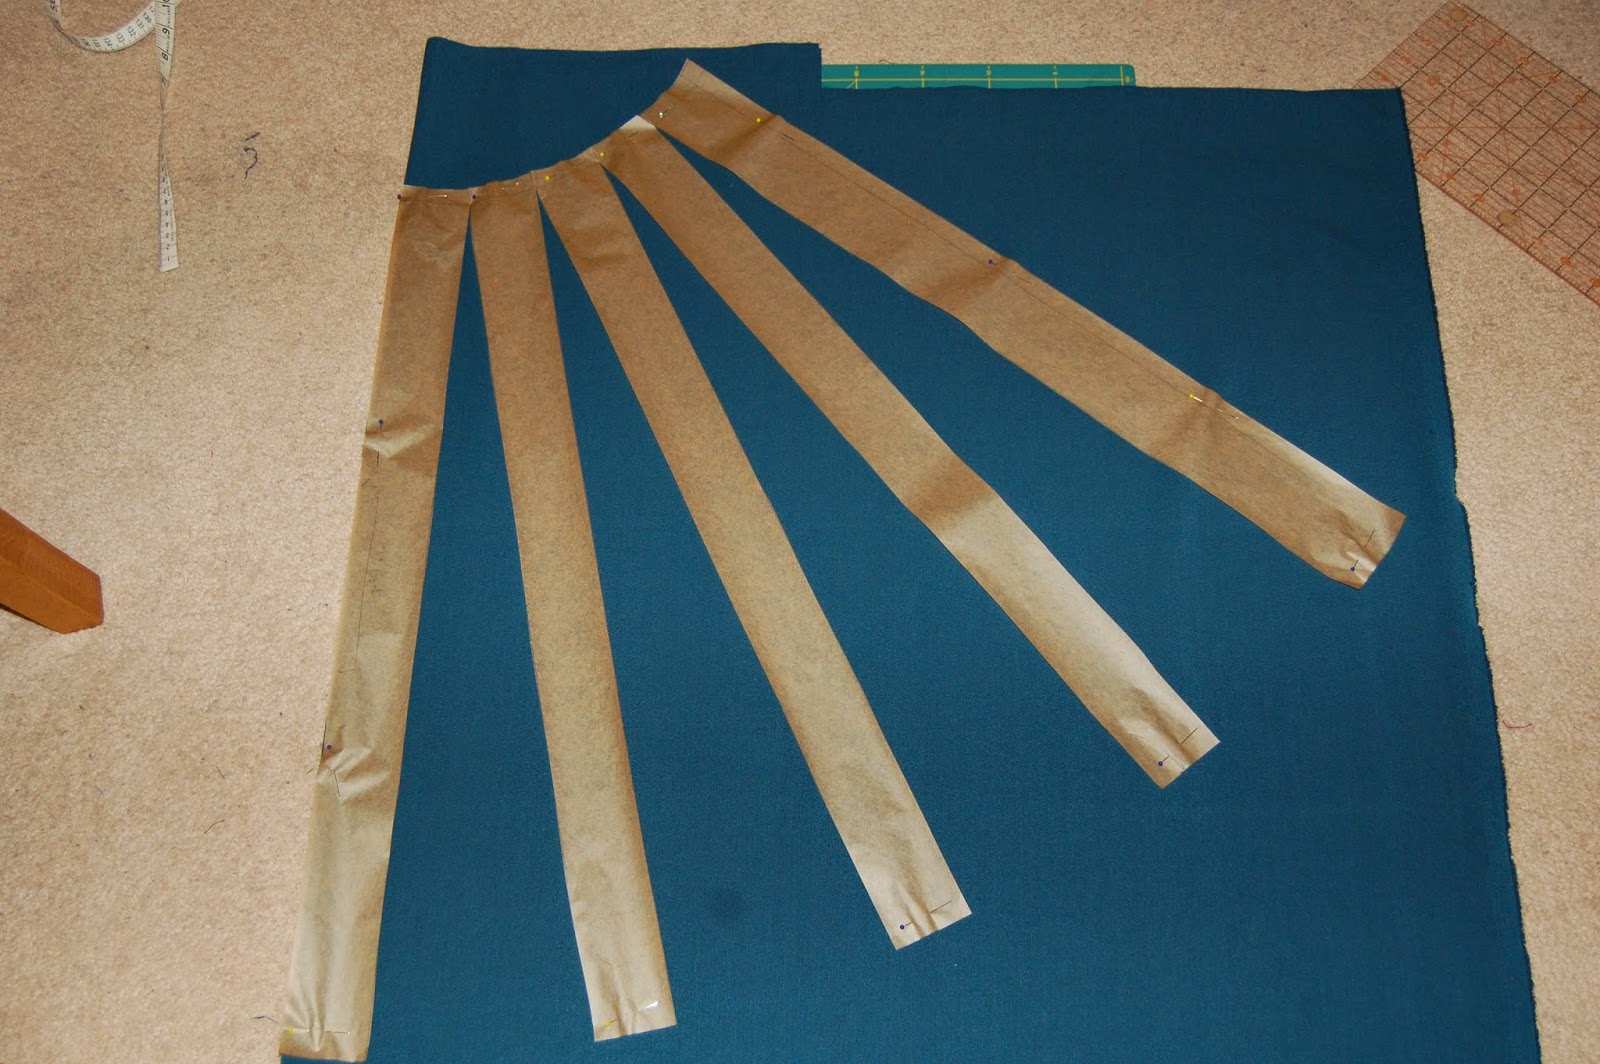
So the spread out rectangle becomes one quarter of the finished skirt.
After making the basic skirt I then spent a whole Saturday making and attaching ruffles. It was all very straightforward, if very boring.
One completed ruffle skirt.


By this point Charlotte was more dress than child! And then she tried the overdress on as well!


Look at the pattern matching around the zip! It was more good luck than good management (although I did actually tack the second side of the zip in before sewing, for once), but I'm still pretty impressed with my bit self.
After the trying on session I did add an extra bit of ruffle. I know, like this dress needs more ruffles! You can't see in theses pictures, but when she turned to the side there was a gap below the bodice where you could see the waistbands of the underskirts. I sewed a short length of ruffle to the bottom of the bodice to cover it.
And finally, a gratuitous couple of shots of my favourite girls.


Guess what Katie wants for Christmas!
Still not sure that I've ever seen a Victorian dress quite like this. I'm sure by Christmas Katie will have thought of something even more exotic if only to have a bigger skirt than Charlotte.
ReplyDelete